
How to install and config Mosquitto on Ubuntu

Trong bài viết hôm nay thì mình sẽ giới thiệu về cách mình install, configuration mosquitto trên UbuntuUbuntu
Step 1 - Install Mosquitto Broker
1
2
sudo apt-get update
sudo apt-get install mosquitto
Thông thường bạn nên install thêm MQTT Client để mình test lại sau khi config tại server nhé.
1
sudo apt-get install mosquitto-clients
Step 2 - Getting The SSL Certificate
Tại step này mình sẽ dùng Let'sencrypt để make SSL Certificate. Tiếp theo bạn cần install Let'sencrypt. Và nếu bạn dùng server nào có sẵn rồi thì không cần install mà hãy bỏ qua bước install này nhé
1
2
sudo add-apt-repository ppa:certbot/certbot
sudo apt-get install certbot
Sau khi install xong, bạn hãy tạo 1 Certificate cho domain của mình nhé, giả sử mình sẽ tạo cho domain mqtt.example.com
1
sudo certbot certonly --standalone --preferred-challenges http -d mqtt.example.com
Sau khi bạn run command và nhận được message thành công và biết được nơi lưu các file cert, thông thường nó sẽ ở /etc/letsencrypt/live/mqtt.example.com/
Step 3 - Secure with a Password
Để tăng cường bảo mật cho việc kết nối qua MQTT thì mình có thể config username và password cho việc authenticate. Và nó cũng rất đơn giản bằng command dưới:
Note: /etc/mosquitto/passwd: là path của file password, còn username bạn đặt gì cũng được :))
1
sudo mosquitto_passwd -c /etc/mosquitto/passwd mqtt_user_name
Step 4 - Setting Up Mosquitto MQTT
Đến bước này bạn chỉ cần tạo 1 file mới để config nữa là done. :))
1
sudo nano /etc/mosquitto/conf.d/default.conf
Bây giờ thêm nội dung bên dưới vào file và nhớ sửa lại những thông tin cho đúng nhé.
1
2
3
4
5
6
7
8
9
10
11
12
13
14
15
16
17
18
19
20
21
22
23
24
25
26
27
28
29
30
31
32
33
34
35
36
37
38
39
40
# =================================================================
# Default listener
# =================================================================

port 1883
protocol mqtt

# =================================================================
# Setup SSL for Websockets
# =================================================================

listener 8081
protocol websockets
cafile /etc/letsencrypt/live/mqtt.example.com/chain.pem
certfile /etc/letsencrypt/live/mqtt.example.com/fullchain.pem
keyfile /etc/letsencrypt/live/mqtt.example.com/privkey.pem


# =================================================================
# Setup SSL for MQTT
# =================================================================

listener 8883
protocol mqtt
cafile /etc/letsencrypt/live/mqtt.example.com/chain.pem
certfile /etc/letsencrypt/live/mqtt.example.com/fullchain.pem
keyfile /etc/letsencrypt/live/mqtt.example.com/privkey.pem

# =================================================================
# Logging
# =================================================================
log_dest file /var/log/mosquitto/mosquitto.log
log_dest stdout
log_timestamp true

# =================================================================
# Security
# =================================================================
password_file /etc/mosquitto/passwd
allow_anonymous false
Đây là những port hay dùng:
- 1883 : MQTT, unencrypted
- 8883 : MQTT, encrypted
- 8884 : MQTT, encrypted, client certificate required
- 8080 : MQTT over WebSockets, unencrypted
- 8081 : MQTT over WebSockets, encrypted
Lưu file lại và restart lại mosquitto để test thôi :D
1
sudo systemctl restart mosquitto
Để check status của mosquitto bạn có thể chạy thử:
1
sudo systemctl status mosquitto
Output như này thì Okay.
1
2
3
4
5
6
7
8
9
mosquitto.service- LSB: mosquittoMQTTv3.1messagebroker
   Loaded: loaded(/etc/init.d/mosquitto;generated)
   Active: active(running)sinceMon2018-08-1714:03:42UTC;2min39sago
     Docs: man:systemd-sysv-generator(8)
  Process: 6683ExecStop=/etc/init.d/mosquittostop(code=exited,status=0/SUCCESS)
  Process: 6699ExecStart=/etc/init.d/mosquittostart(code=exited,status=0/SUCCESS)
    Tasks: 1(limit:1152)
   CGroup: /system.slice/mosquitto.service
           └─6705/usr/sbin/mosquitto-c/etc/mosquitto/mosquitto.conf
Nếu như bạn không nhận được output như trên thì có thể bạn đã config sai gì đó, có thể là đụng port, để biết rõ hơn bạn có thể check log bằng command dưới:
1
sudo tail /var/log/mosquitto/mosquitto.log
Note: Nếu bạn run server trên EC2 hoặc 1 cái server nào đó thì nên mở những port mà bạn đã dùng nhé. Vd như EC2 thì bạn check ở Inbound của Instance nhé
Step 5 - Setting Up Certibot Renewals
Certbot được thiết kế để gia hạn chứng chỉ SSL trước ngày hết hạn, nhưng mặc định thì nó không có config để restart lại mosquitto, vì vậy bạn cần thêm 1 bước nhỏ nữa là config nó thôi. :))
1
2
3
4
sudo nano /etc/letsencrypt/renewal/mqtt.example.com.conf

// thêm đoạn này vào cuối file nhé.
renew_hook = systemctl restart mosquitto
Lưu file lại và có thể test thử luôn bằng command dưới nhé:
1
sudo certbot renew --dry-run
Nếu ko có lỗi nào xuất hiện thì bạn đã config đúng.
Step 6 - Verifying The MosQuitto MQTT
Như lúc đầu mình có đề cập, sau khi install xong và config xong xuôi thì mình cần test lại xem nó có work hay không bằng mosquitto-clients
Thì đầu tiên bạn cần subscribe vô 1 topic bất kỳ, ở đây mình chọn topic work, bạn nên mở 2 tab, 1 tab cho subscribe và 1 tab để publish để dễ tracking:
1
mosquitto_sub -h localhost -t work -u "your-user" -P "your-password"
Tiếp theo mình sẽ publish lên topic đó và sử dụng mosquitto_pub:
1
mosquitto_pub -h localhost -t work -m "hello. tannguyen test " -u "your-user" -P "your-password"
Bạn check màn hình console xem thử có hiện message vừa gửi ko nhé, nếu hiện là nó OK.
Nếu bạn chạy command trên, port mặc định sẽ lấy là 1883 tức là đang chạy ở protocol là mqtt, vậy nếu muốn dùng port 8883 thì như nào. Giải pháp là bạn sẽ thêm tham số khi chạy command như sau:
1
mosquitto_sub -h mqtt.mydomain.com -t work -p 8883 --capath /etc/ssl/certs/ -u "your-username" -P "your-password"
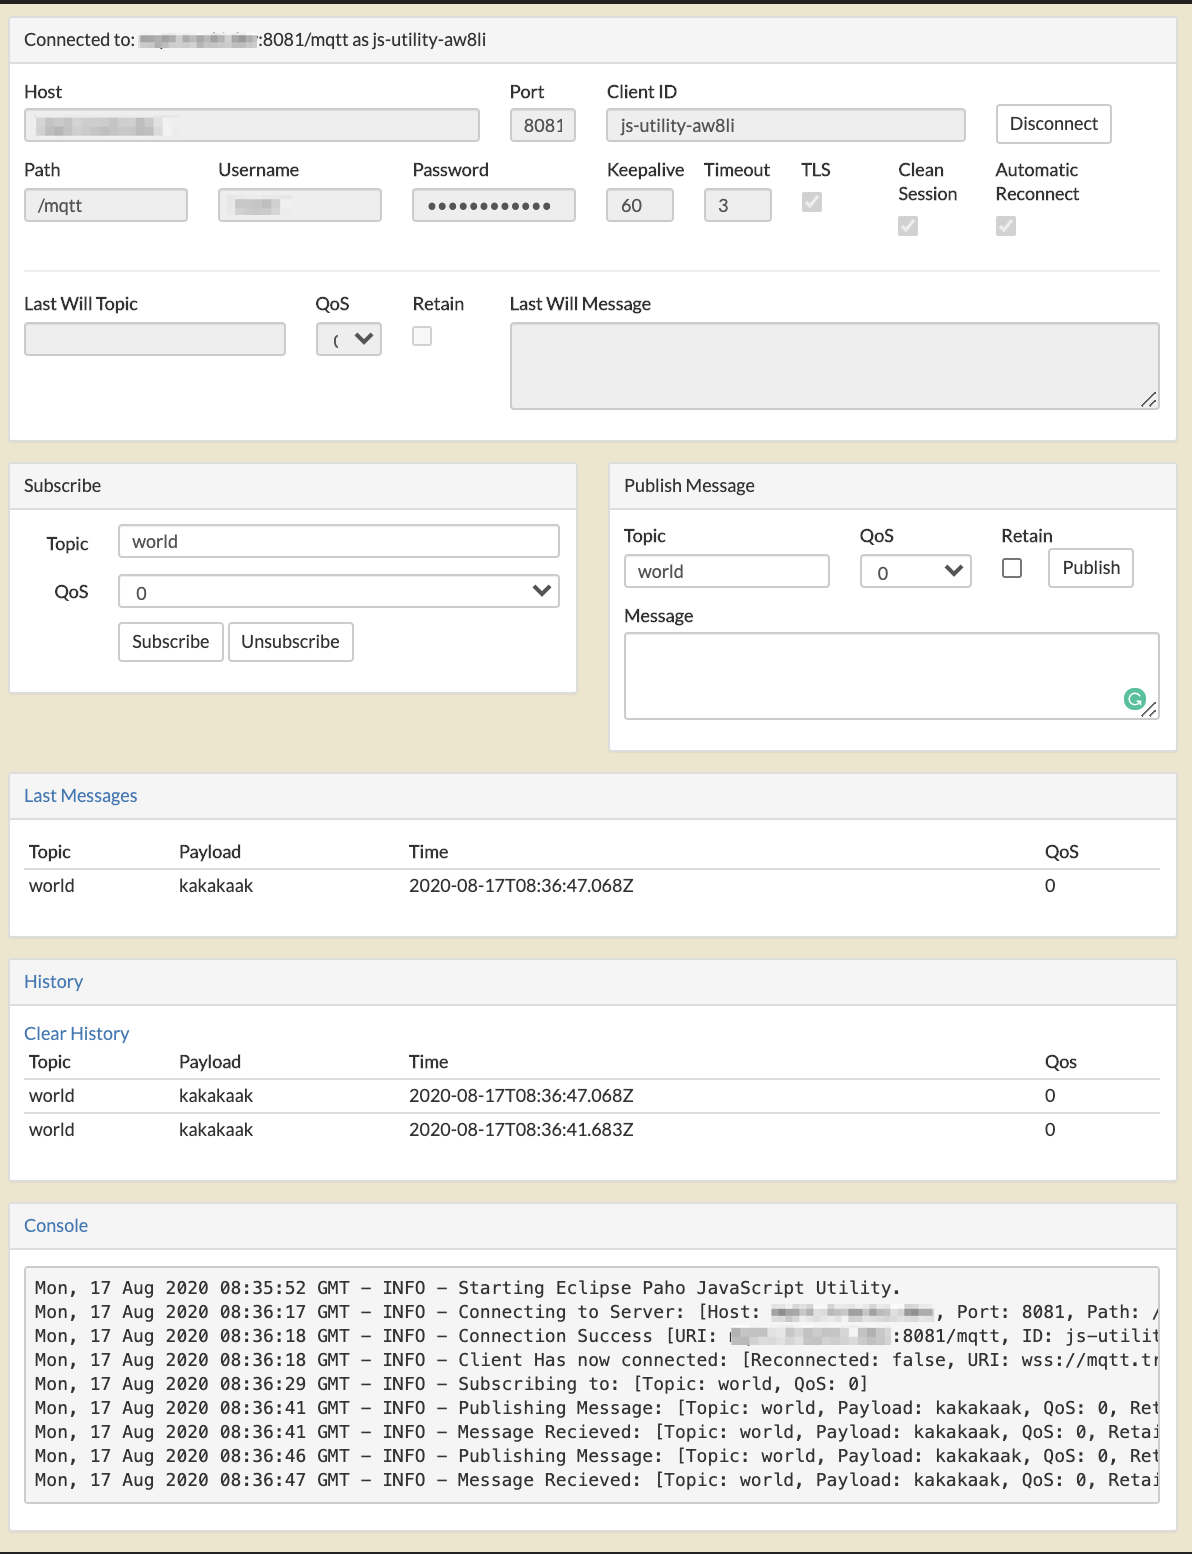
Để test với port 8081, thì bạn có thể lên trang web này để test xem thử nó có work chưa nhé: http://tannguyenit.github.io/mqtt-testing.html
Cảm ơn các bạn đã đọc, nếu có gì góp ý, bổ sung thì hãy comment dưới bài này nhé :))