Deploy Laravel to EC2 using Deployer by Bitbucket
Trong bài viết lần trước mình đã giới thiệu về Deployer và hôm nay mình sẽ hướng dẫn các bạn dùng deployer để deploy project Laravel kết hợp với Bitbucket pipeline
1 Init source code
Đầu tiên chúng ta cần init một Laravel Project, hiện tại mình đang dùng version mới nhất của Laravel (8.12)
1
curl -s "https://laravel.build/laravel-example" | bash
2 Init deployer
Bước tiếp theo là init deployer cho project
1
2
cd laravel-example
dep init -t Laravel // -t ở đây là dùng template của Laravel nhé
Bạn sẽ thấy 1 file deploy.php được add vào root folder
Đầu tiên mình sẽ config lại host nhé, Mình nghĩ nên dùng file yaml để define cho hosts
hosts.yml
1
2
3
4
5
6
7
8
9
10
11
12
13
14
15
16
17
18
19
20
.base: &base
  user: ubuntu
  deploy_path: ~/apps/project/htdocs
  keep_releases: 2
  ...

develop:
  <<: *base
  hostname: 0.0.0.0
  stage: develop

release:
  <<: *base
  hostname: 0.0.0.0
  stage: beta

master:
  <<: *base
  hostname: 0.0.0.0
  stage: production
Update lại file deploy
1
2
3
...
// add this line
inventory('hosts.yml');
Tiếp theo là config các params cần thiết
1
2
3
4
5
6
7
8
// Project name
set('application', 'Laravel');

// Project repository
set('repository', 'git_repo_endpoint');

// [Optional] Allocate tty for git clone. Default value is false.
set('git_tty', true);
Cuối cùng là định nghĩa một số tác vụ cần thiết:
1
2
3
4
5
6
7
8
9
10
11
12
13
14
15
16
17
18
19
20
21
22
23
24
25
26
27
28
29
30
31
32
33
task('confirm', function () {
    if (!askConfirmation('Are you sure you want to deploy to production?')) {
        write('Ok, quitting.');
        die;
    }
})->onStage('production');

task('deploy', [
    'confirm',
    'deploy:info',
    'deploy:prepare',
    'deploy:lock',
    'deploy:release',
    'deploy:update_code',
    'rsync',
    'deploy:shared',
    'deploy:vendors',
    'deploy:writable',
    'artisan:storage:link',
    'artisan:view:clear',
    'artisan:cache:clear',
    'artisan:config:cache',
    'artisan:optimize',
    'deploy:symlink',
    'deploy:unlock',
    'cleanup',
])->desc('Deploy project');

before('deploy:symlink', 'artisan:migrate');

after('deploy', 'success');

fail('deploy', 'deploy:unlock');
Tới đây thì đã xong việc config cho file deploy
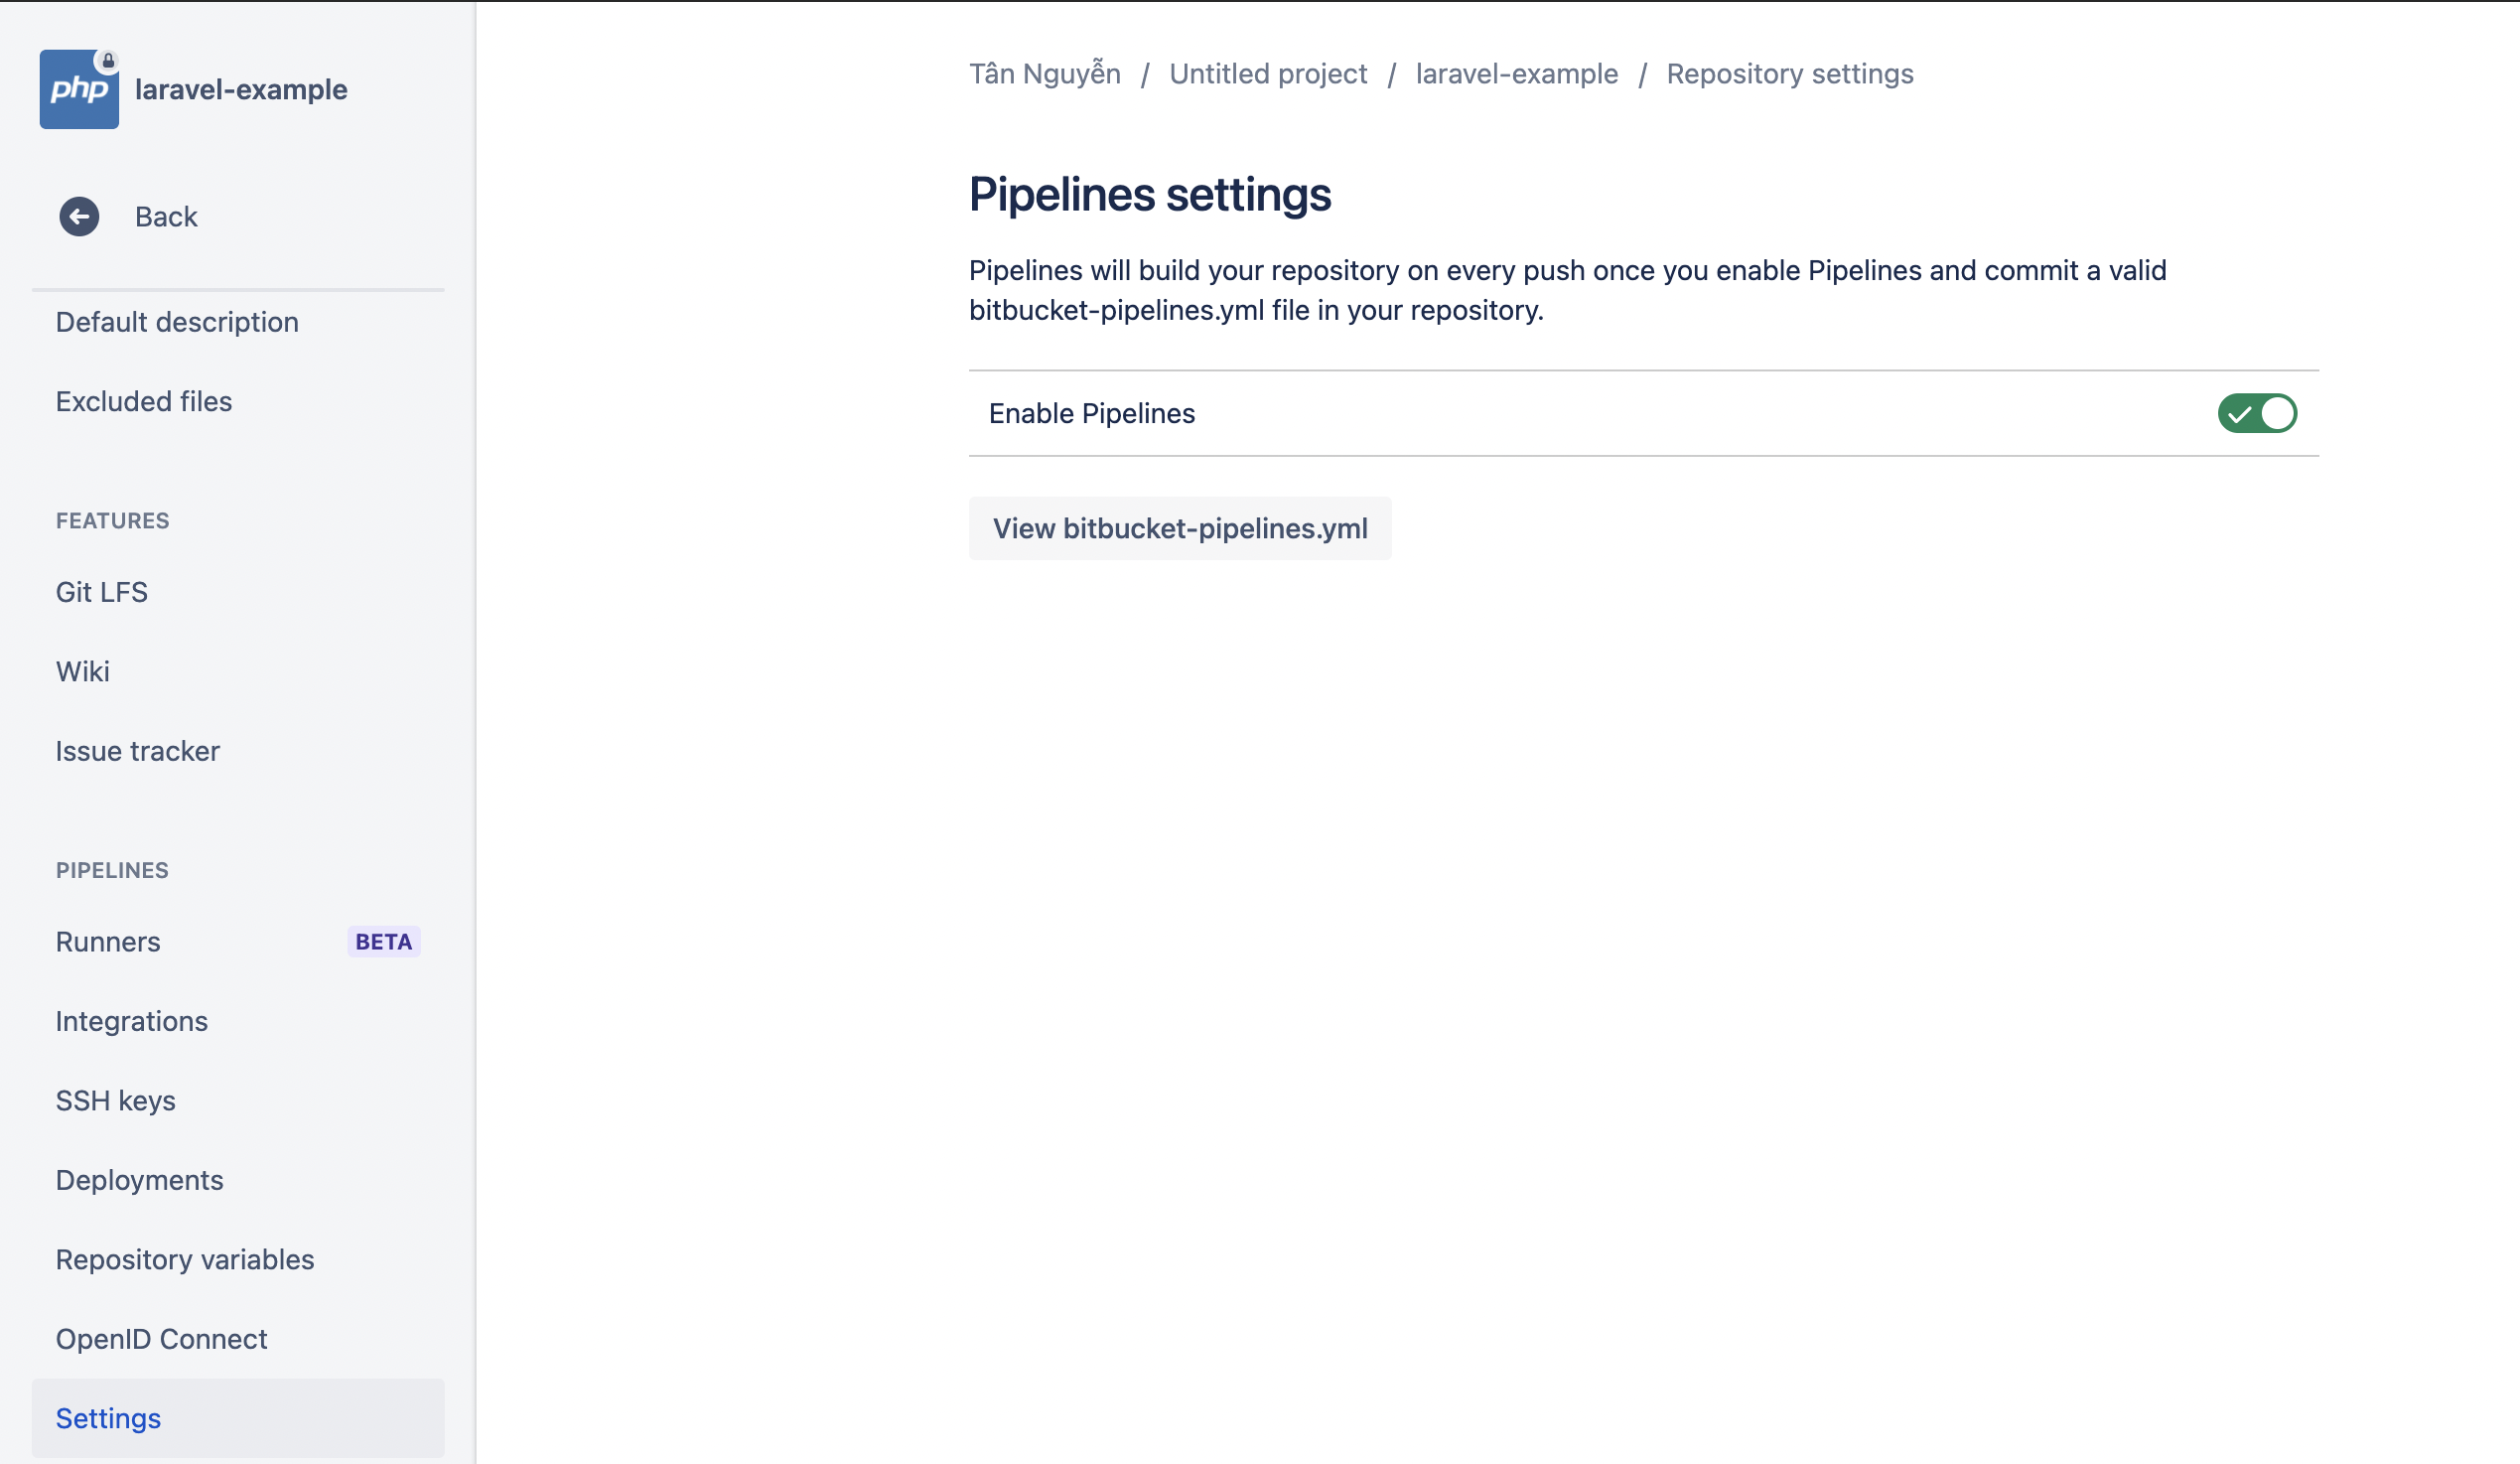
3 Config bitbucket
Như ban đầu chúng ta đã đề cập, chúng ta sẽ dùng bitbucket để auto build khi code được merged, và ở đây chúng ta sẽ dùng bitbucket-pipeline.yml config file
Đầu tiên bạn cần enable pipeline của bitbucket
Tiếp theo bạn cần update lại file bitbucket-pipelines.yml
Đây là file của mình, bạn có thể tham khảo hoặc tự tìm hiểu và viết theo cách của bạn:
bitbucket-pipelines.yml
1
2
3
4
5
6
7
8
9
10
11
12
13
14
15
16
17
18
19
20
21
22
23
24
25
26
27
28
image: php:7.3

definitions:
  steps:
    - step: &install-dependency-and-deploy-to-server
        name: Install dependency and deployer
        caches:
          - composer
        script:
          - apt-get update && apt-get install -y unzip openssh-client rsync
          - curl -sS https://getcomposer.org/installer | php -- --install-dir=/usr/local/bin --filename=composer
          - composer install
          - composer global require deployer/deployer
          - composer global require deployer/recipes --dev
          - /root/.composer/vendor/bin/dep deploy $BITBUCKET_BRANCH

pipelines:
  branches:
    develop:
      - step:
          <<: *install-dependency-and-deploy-to-server
          deployment: Development
          name: Deploy to Dev Server
    master:
      - step:
          <<: *install-dependency-and-deploy-to-server
          deployment: Production
          name: Deploy to Prod Server
Cái quan trong chỗ này là đoạn script
1
/root/.composer/vendor/bin/dep deploy $BITBUCKET_BRANCH
Mình sẽ cài đặt deployer và các recipes thông qua composer ở mode global. Sau khi install xong thì sẽ chạy deploy cho branch được meged
Tức là khi source code được merge vào develop thì nó sẽ deploy develop ( host)
Config bitbucket
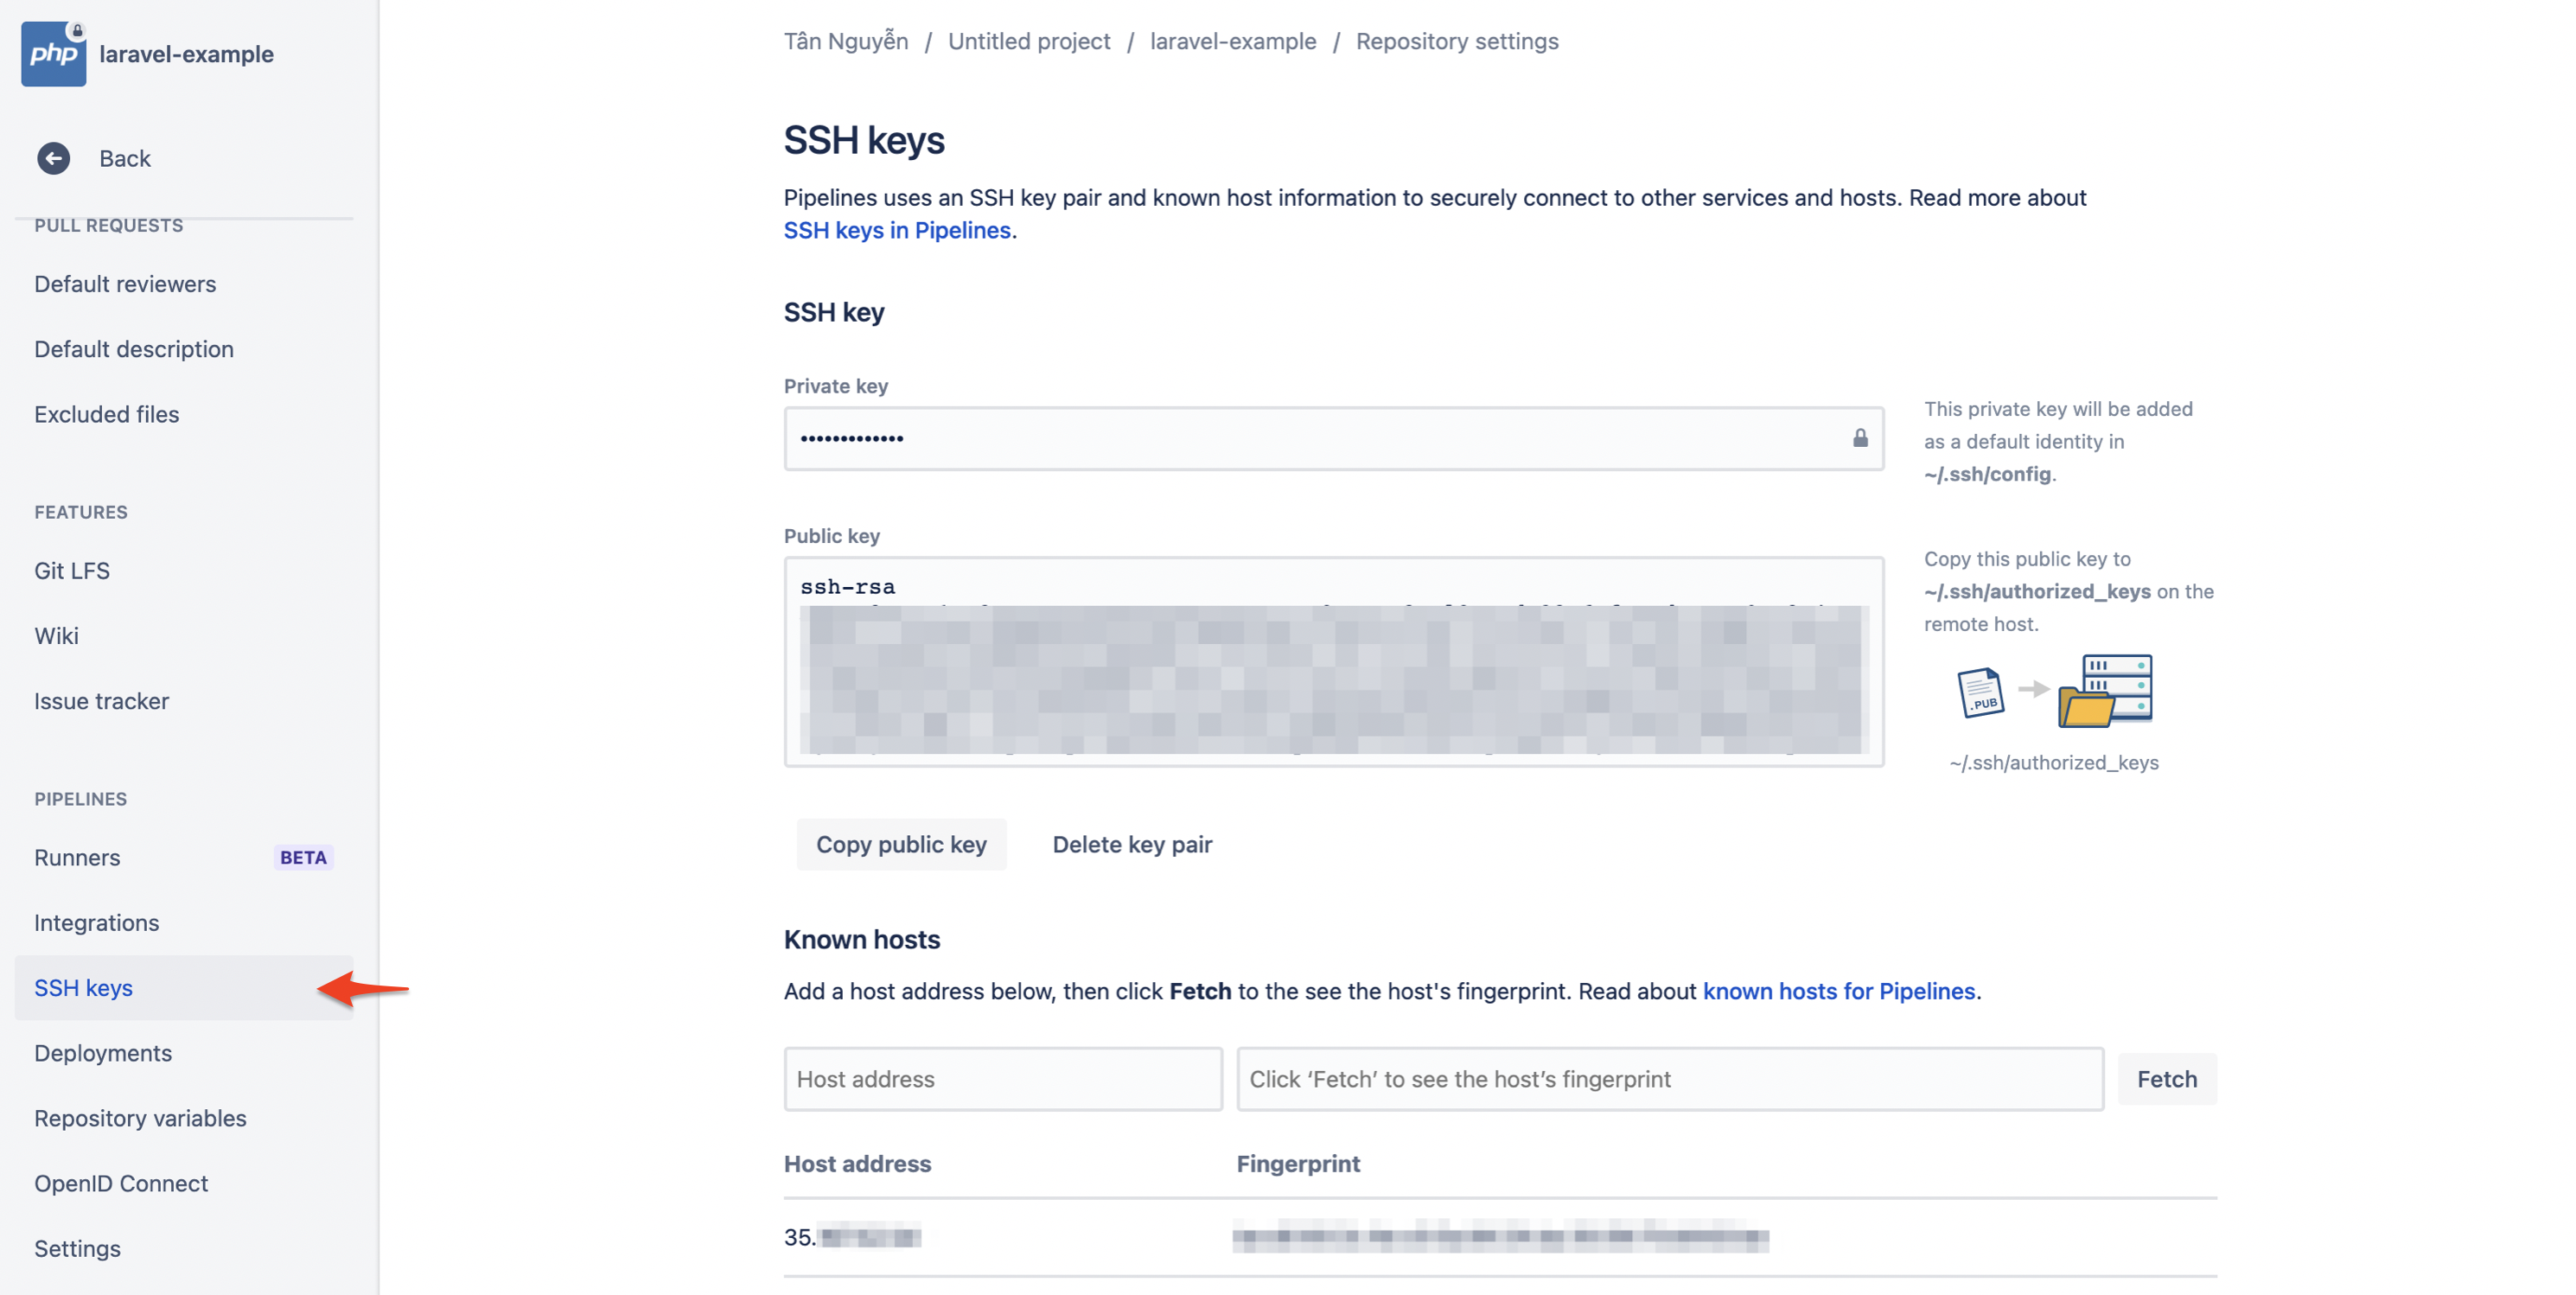
1. SSH key
Deployer sẽ access đến EC2 thông qua SSH, vậy chúng ta cần phải add SSH key từ bitbucket vô EC2 bằng cách sau:
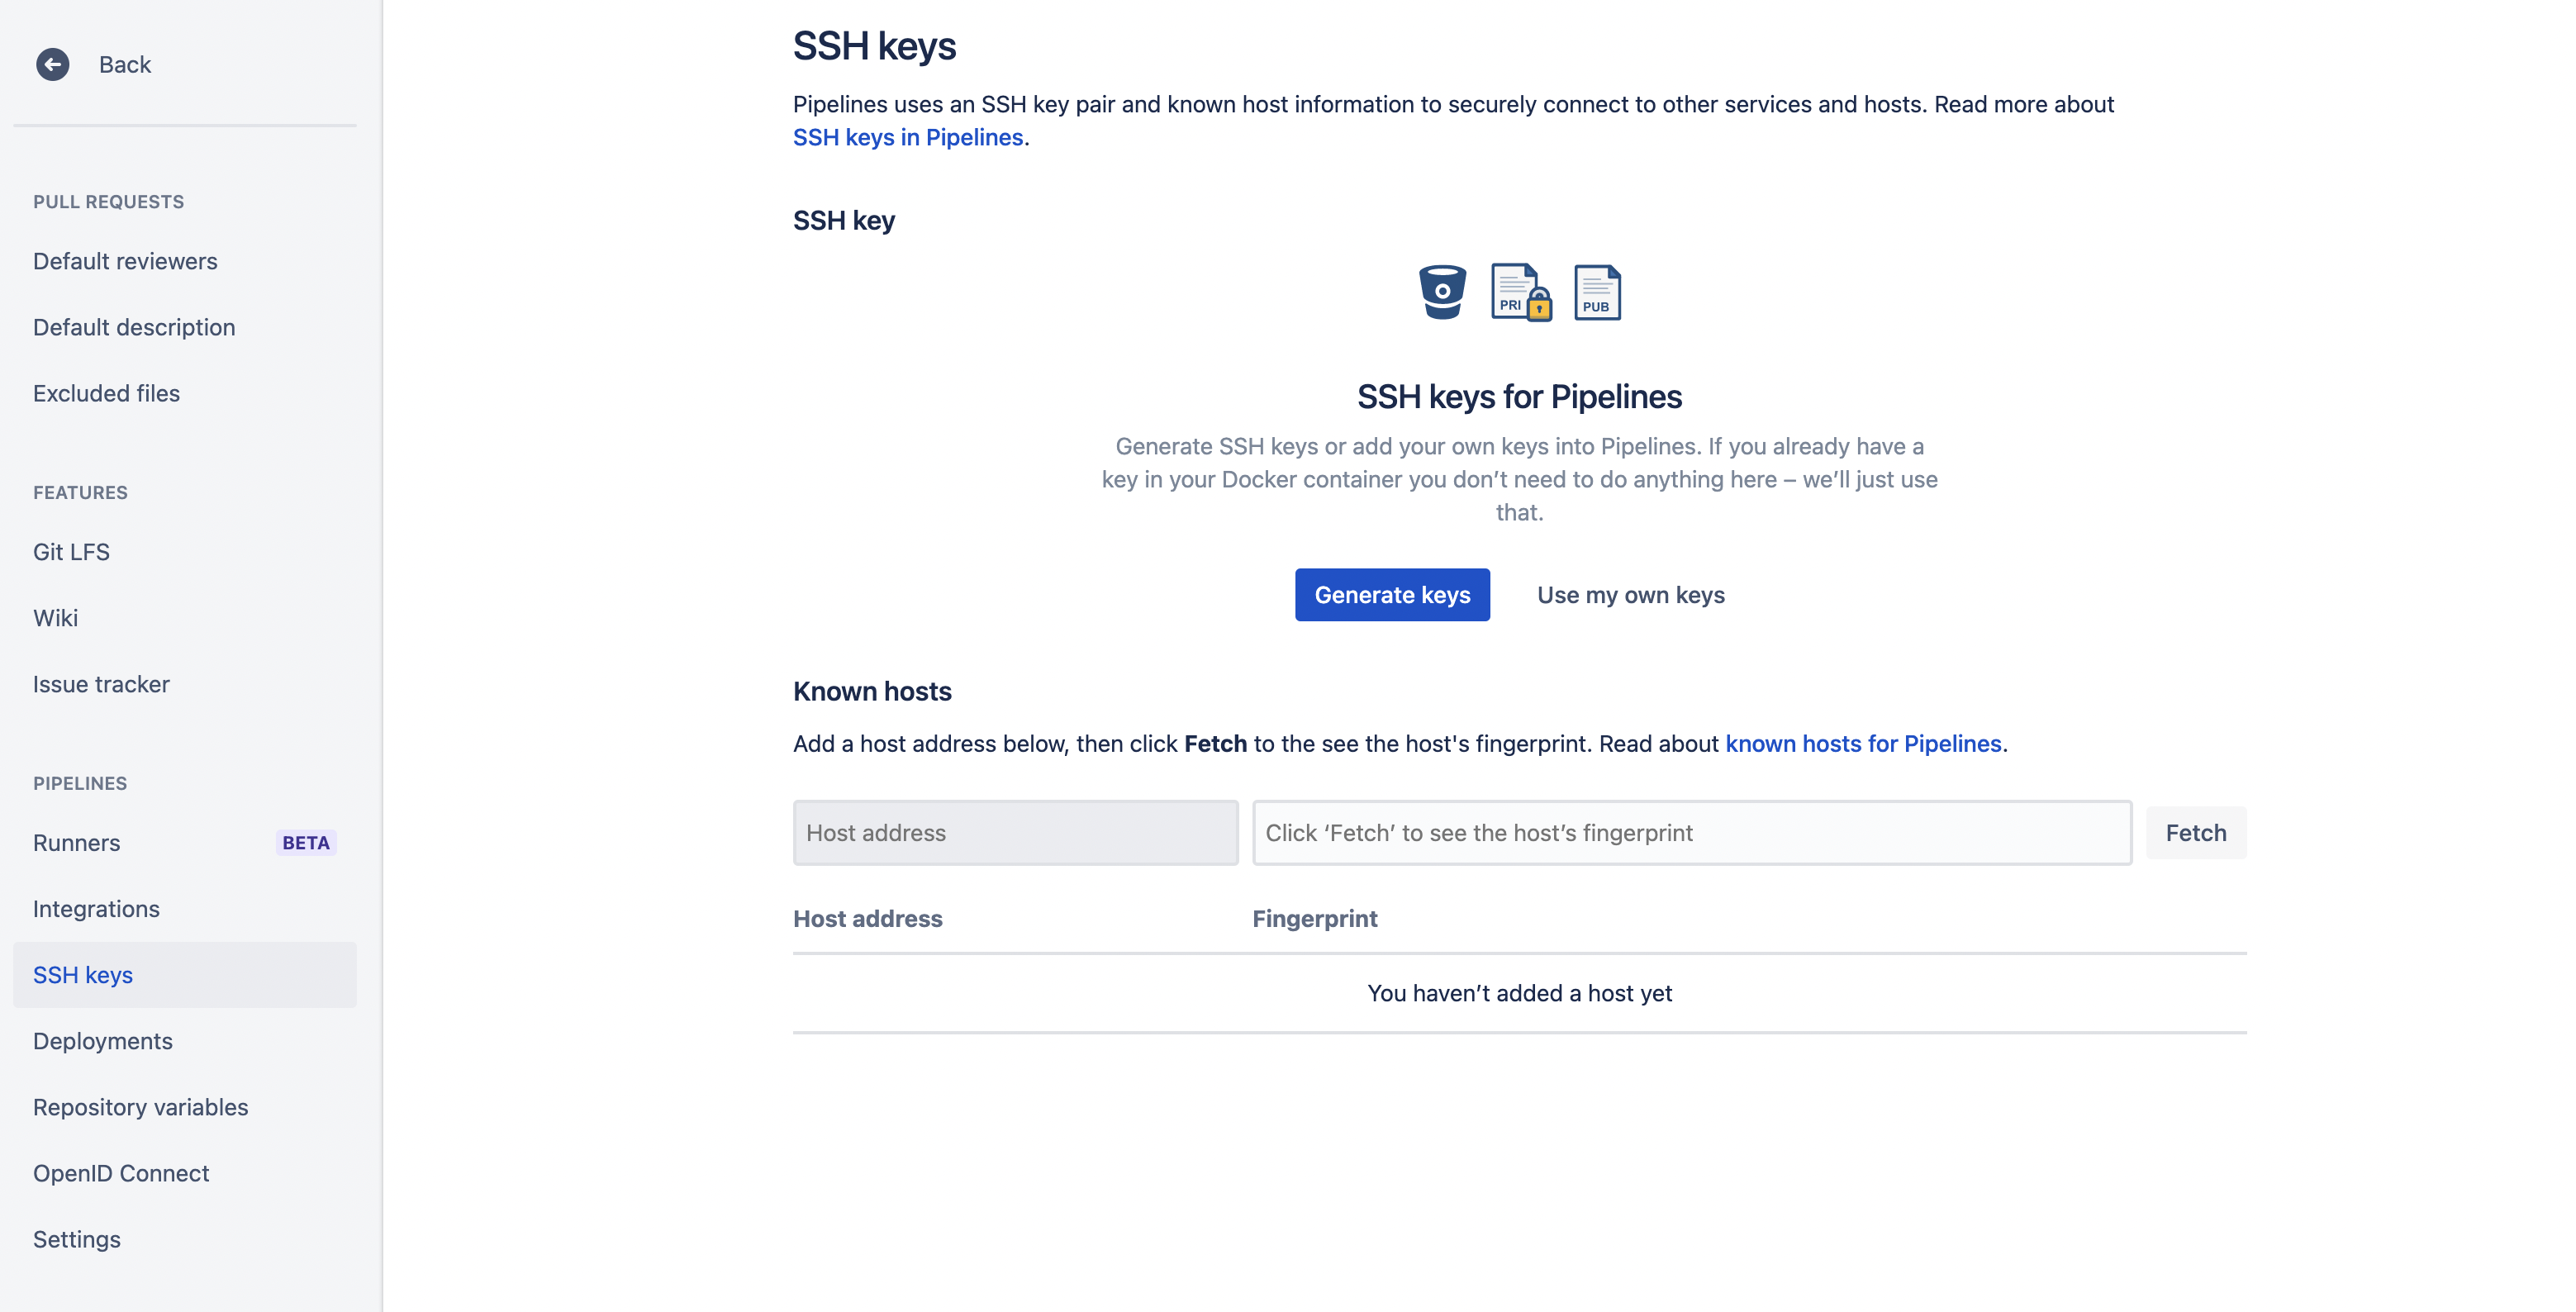
Vào Repo settings -> SSH keys –> click Generate keys button
Sau khi genrate xong thì bạn sẽ có 1 private key và 1 public key
TIếp theo bạn Copy public key và add vào ~/.ssh/authorized_keys ở remote host (EC2)
Sau khi add xong bạn nhập server name hoặc IP vào ô Host address và click Fetch button để verify nhé. Sau khi làm tới bước này bạn sẽ thấy như hình dưới.
2. Access key
Để có thể clone source code từ EC2 thì bạn cần config SSH key từ EC2
- Access EC2 Instance
- Run bellow command:
1
ssh-keyscan -H bitbucket.org >> /home/ubuntu/.ssh/known_hosts // command này sẽ add bitbucket vào known_hosts nhé
1
2
ssh-keygen
cat ~/.ssh/id_rsa.pub
- Copy key vừa tạo và add vào Access key của bitbucket
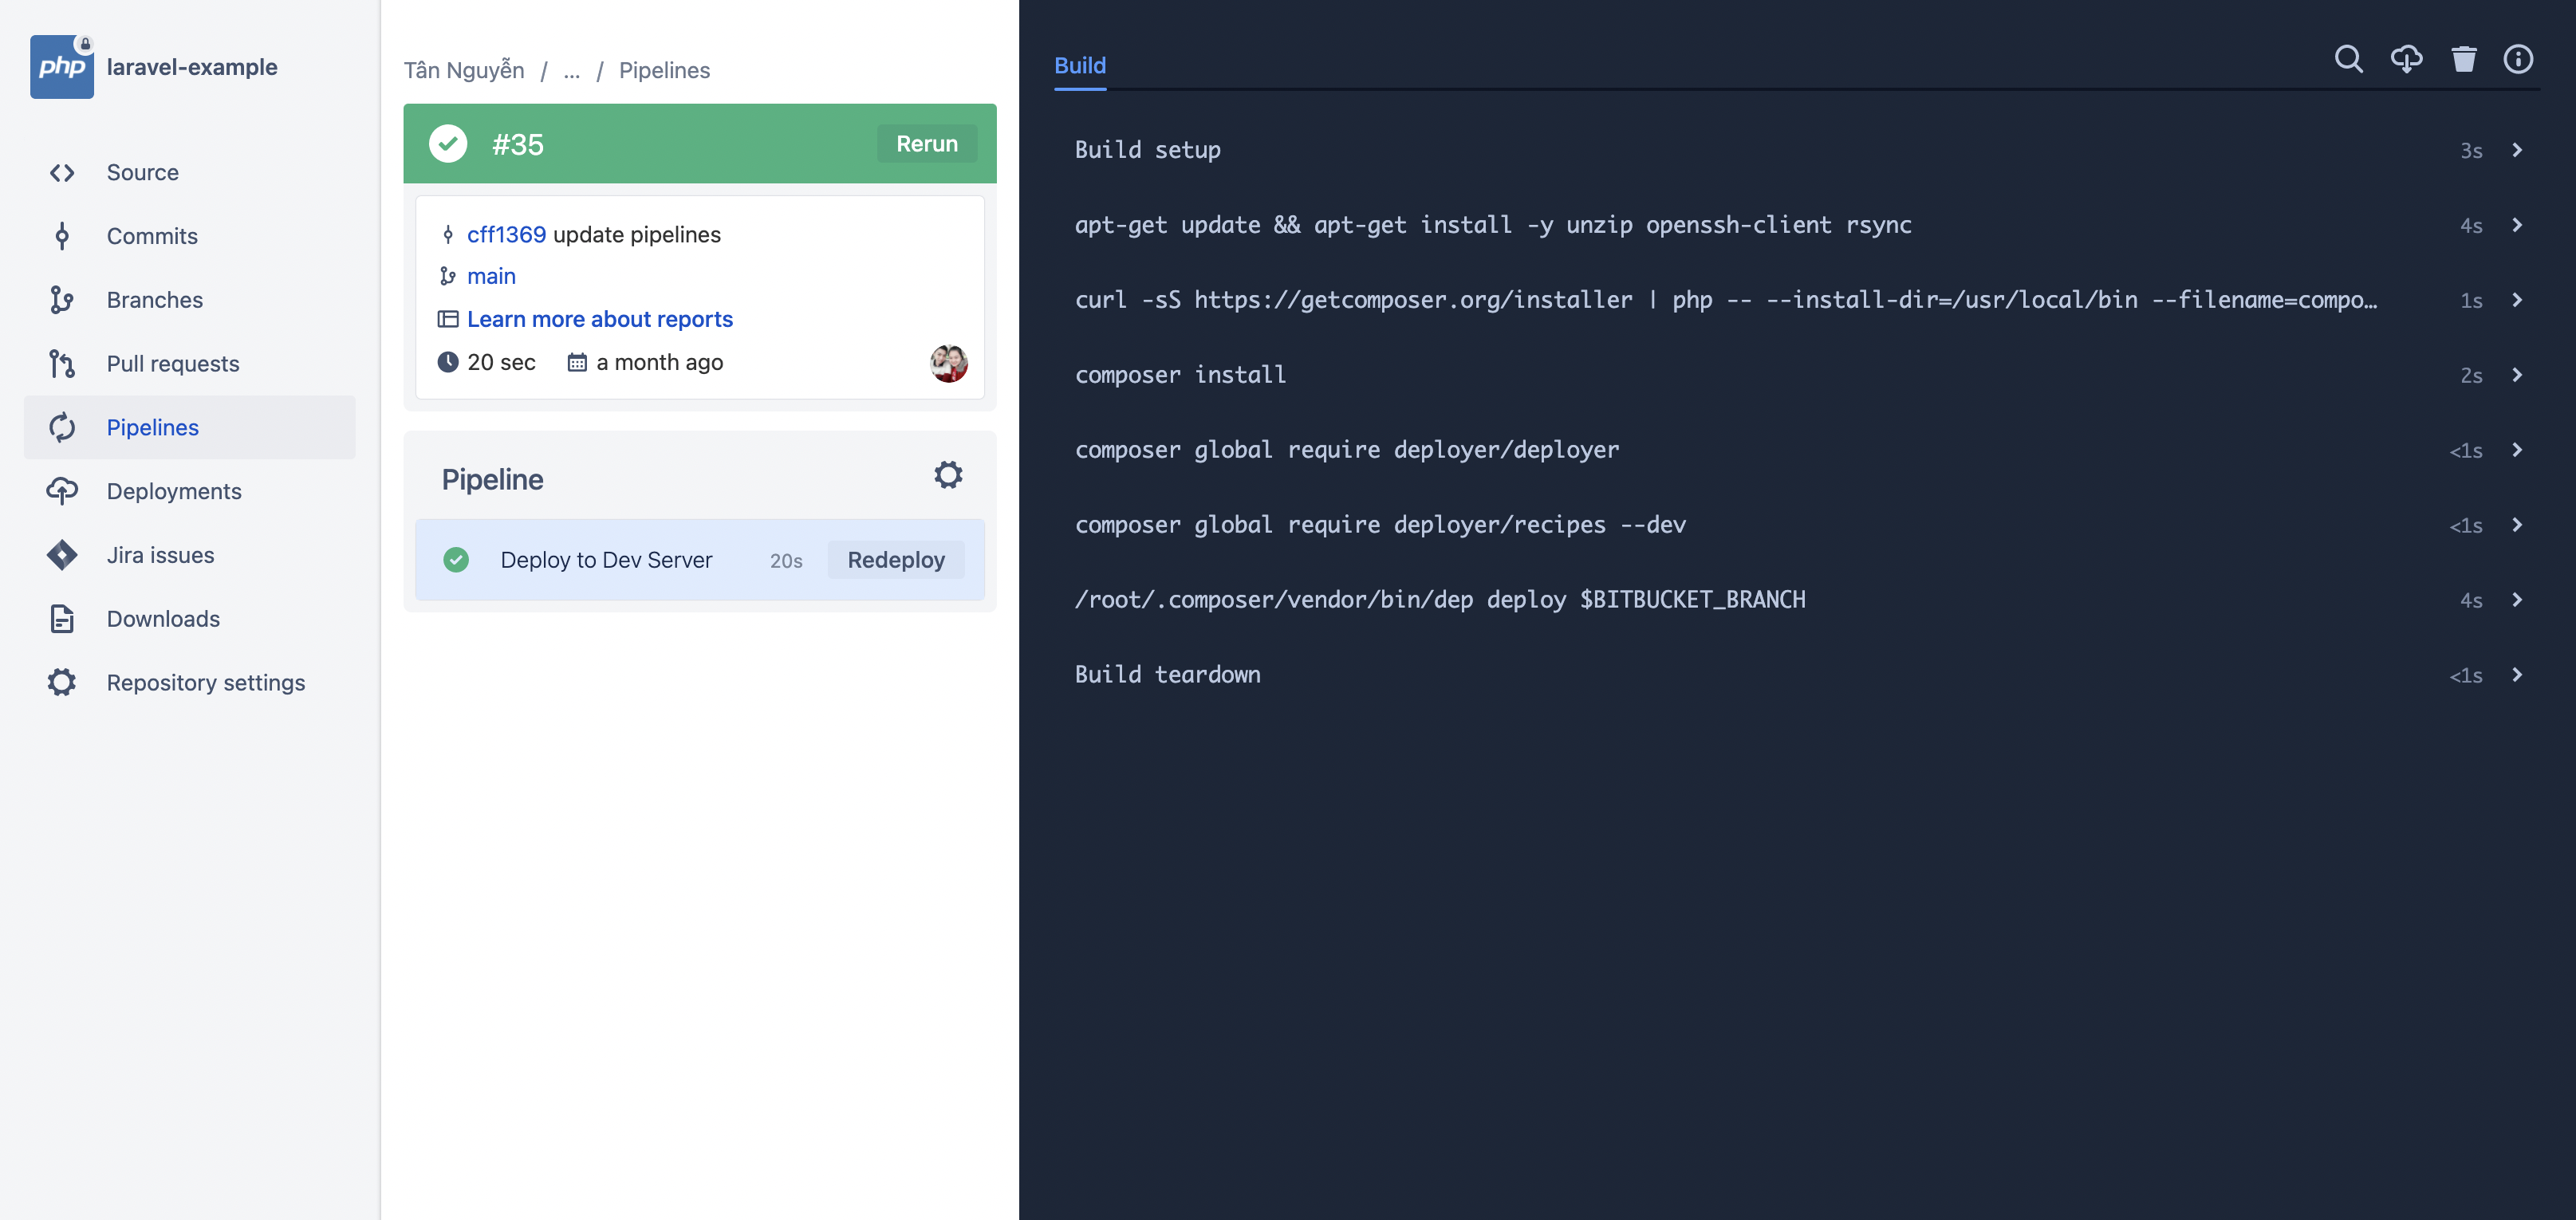
4 Test
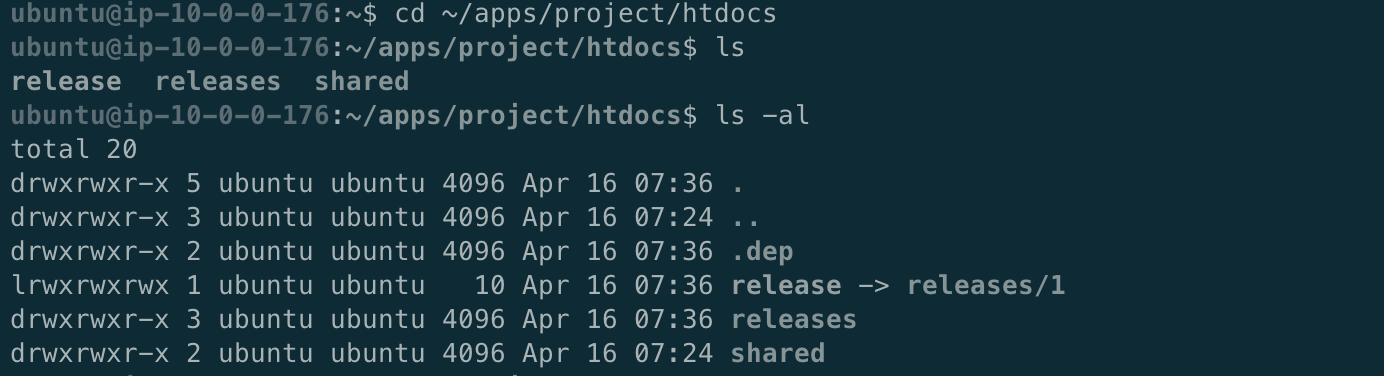
Sau khi đã config xong thì bạn hãy push 1 file gì đó lên và merge vào branch develop thử nhé. Và đây là kết quả
Khi deploy lên EC2 thì bạn hãy vào thử mục bạn đã config ở deploy_path để check lại nhé